Food: Baked Spaghetti squash with lentil ragù

Having seen them be an Autumnal regular on many American food blogger’s Instagram feeds, I was pleasantly surprised when I found a spaghetti squash at Möllan Market, here in Malmö. I bought a good sized one, for myself and the Mr to share for dinner for 22kr (£1.87), but now was the challenge, what the hell do I do with it?! The solution came in the unlikely form of Instagram, one of my friend’s here in Malmö, Nourish With Julie (IG), also a food and travel blogger, had done spaghetti squash ‘pasta’ the previous night and a little guide to how to cook a spaghetti squash in her stories. So, fired up I decided to put a twist on it, using my lentil ragù recipe to fill the big orange vessels. However, instead of using green lentils I used red ones to have it all meld together to the colour of an Autumn leaf. To make my take on it, you’ll need:

(Feeds 2 (generously))

  • 1 spaghetti squash, de- seeded and cut in half
  • 1 yellow onion, chopped
  • 2 cloves of garlic, minced
  • 1 tin of chopped tomatoes
  • 100g of red lentils
  • 200ml of water
  • Splash of rapeseed oil/vegetable oil
  • 1 tbp of tomato puree
  • 1 tbp of sundried tomatoes/sundried tomato paste (optional)
  • Splash of red wine (optional)
  • ½ tsp of salt
  • ½ tsp of black pepper (or more!)
  • 1 tsp dried basil (or a generous handful of fresh if you can get it)
  • 1 tsp dried oregano
  • 2-3 bay Leaves

Herbed breadcrumbs:

  •  100g (usually 3-5 slices) of stale bread
  • 1 tsp onion powder
  • 1 tsp garlic powder
  • 1 tsp dried rosemary
  • 1 tsp dried oregano
  • 1 tsp dried basil
  • Sprinkle of salt ( I used Halen Môn Anglesey sea saly)
  • Pepper

Garnish:

  • Fresh basil leaves (optional)
  • Drizzle of garlic-infused oil


Start with the spaghetti squash, on a chopping board, cut it through the middle (be careful at this step, as the knife may not go through the flesh easily, depending on the individual squash) and scoop out all of the seeds. The seeds you can use as a snack, by seasoning them with spices and a little oil and oven baking them so don’t throw them away! Once you have two halves of squash, now with empty cavities, brush a little oil on them, followed by a crack of salt and pepper. Place them face down on a baking tray and place them into a pre-heated oven at 180°c for roughly 40-50 minutes (depending on the size of the squash).

Whilst the squash cooks you can sort out the ragù.

Fry the onions and garlic in the oil over a medium heat until soft. Stir in the tomato paste and the tin of tomatoes. Season with the herbs, the salt and the black pepper and add the splash of wine if you have it.

Pour in the lentils and add ¾ of the water to the mix. The lentils will suck up the water as they cook. give it a good stir – add more water if it’s looking a bit thick. Simmer on the back ring on a medium heat until the lentils are soft. Take out the bay leaves and set aside.

Once the squash halves are done, take them out of the oven and rough the flesh up a bit with a fork. Next, fill with the ragù and top with some herby breadcrumbs. You can easily make these by taking some stale bread and the dried herbs and blending them up with a food processor. Once broken down into seasoned breadcrumbs, top the ragù, as you would with some Parmesan, drizzle with some garlic oil, a sprinkle of the salt and place back in the oven for a further 10 minutes.

When the top is all golden, garnish with some basil leaves and serve with a side salad with a punchy dressing and some bread. As the squash are quite substantial on their own, you wont need a lot to go with them.


Enjoy!


Food: Gower Gin & orange marmalade

Recently, my local greengrocers had a glut of oranges that needed using up. With a few on the turn, they weren’t able to sell them at their normal price (which is also cheap, might I add, defying the myth that living in Sweden is ‘expensive’). I was able to get a bag of at least 15 oranges for the measly sum of 5kr (43p) and only 3 of them were duds!

Needing to use this citrusy surplus up, I got my thinking cap (and my apron!) on and made use of them. Making a marmalade instantly came to mind, so the next question was, what to pair with it? As I didn’t want a boring old orange marmalade. Why, of  course gin! I used some gin from producers Gower Gin Co , from my home-city of Swansea, South Wales.  The resulting product is a punchy, citrusy marmalade that’s great spread on toast (has to be good bread, though), swirled through porridge, or gone full-circle and made into a cocktail.  The recipe below makes one big pot of the stuff, but feel free to double, even triple the recipe, you wont regret it!

To make you’ll need:

  • 6 oranges, (Seville oranges work best)
  • 1 lemon
  • 1 full kettle of water (mine can hold 1.2 litres of water)
  • 600g golden granulated sugar
  • 2 shots of gin, I used Gower Gin Co’s Gŵyr Gin

To start, cut all (but two) of the oranges and the lemon in half and juice into the a large pan, using a sieve to collect the seeds. Once you’ve done this, take out the seeds with a spoon and scoop out any flesh that had been collected by the sieve. Tip this into the pan. The rinds of all of these oranges and lemons are vital for the marmalade, so the next step is to cut them up and add them to the pan. Here’s where you can personalise the preserve to your liking, if you like it fine, cut it fine, but if you like it chunky, like I do, roughly chop up the peel. Add the water to the pan from a recently boiled kettle. It isn’t necessary, but I feel it speeds up the boiling process. Turn the hob to a medium-high heat. Add in the sugar and the remaining two oranges. Stir. You want to keep it to a rolling boil. Cook for 15 minutes. The reason I added in the two oranges in whole, is to give the conserve more body. A trick implemented by the makes of ‘whole orange squash’. After 15 minutes the fruits should be squidgy and soft. Remove and place into a mixing bowl. With a hand blender, give it a few pulses. What it should give is a very thick pureé, full of zesty goodness. Remove the pips with a spoon before pouring back into the pan. Cook for a further 30-40 minutes, giving it the ‘plate test’ every 10 minutes. The ‘plate test’ is if you drop a bit of the mixture onto a chilled plate/ saucer, it should start setting, forming a skin. You can test this by poking with your finger. If 40 minutes doesn’t do it, keep cooking and checking until it does.

When it finally passes the test, take it off the heat and leave for a few minutes. This is because we want to keep as much of the gin’s boozy punch as possible. After a few minutes stir in the gin and pour into a sterilised jar. Place the lid on and leave to cool to room temperature before placing in the fridge (if you pre-emptively place it in the fridge it can mess with the internal thermostat of the fridge). It’ll set up even thicker in the fridge over night. Good things come to those that wait 😉


Enjoy!

Food: Bougie PB&J

I had half a punnet of strawberries that needed using up, so I decided to make them into a bougie conserve. So with it an easy way to pimp up your standard PB&J. Here’s how to do it. You can totally scale up the recipe, but I’m just jotting down what I had to work with.

For the Strawberry, lime & white rum jam

  • 100g strawberries, de-stalked
  • 50g sugar
  • 100ml water
  • Juice & zest of 1/2 lime
  • 1 shot of white rum (optional)


to make, simply put a pan on the hob on medium-high and place in the sugar, strawberries and the water. It should take a few minutes for it all to start bubbling, but when it does it will come together quite quickly, so don’t get distracted as it can burn easily. Cook for 5-7 minutes on high until you can see it all becoming a pan of red, strawberry flavoured loveliness. When you see that happening, take it off the heat and add in the lime zest, juice and the rum. As it will still be hot, be careful when mixing it in. Pour into a glass jar and leave on the countertop to cool before putting it in the fridge to set, preferably overnight.


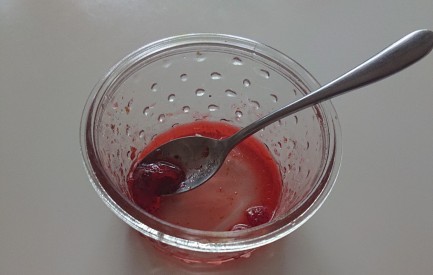
The next day the jam should have set and be halfway between a jam and a firm compote.


IMG_20180820_093305_2.jpg

This is what I had left of the jam after scoffing it all down!

The next step to make is the peanut caramel. To make you’ll need:

  • 50g demerara sugar
  • 100ml water
  • 20g peanuts (I used roasted peanuts, but you can use un roasted too)
  • Pinch of salt. I used some exquisite Anglesey sea salt with Tahitian vanilla from Halen Môn

Like the jam,  add in the sugar and the water and cook in a hot pan until they start forming a light caramel, then add in the peanuts. Roll them around in the pan, without using a spoon or spatula and enrobe them in the caramel. Cook the caramel mixture out until it turns golden brown. Pour onto a silicone baking sheet (you can use a spatula now) and sprinkle with the salt. The flavour of Halen Môn’s vanilla salt will compliment the lime and strawberry of the jam perfectly. Leave to cool and harden.

DSC_0188.JPG

Halen Môn’s Anglesey Sea Salt with Tahitian vanilla.

Now to make the foundation of it all, the toast. I used some great sourdough from a local bakery here in Malmö, Organic Bakery, that I rescued with this great app here in Sweden and also in London called Karma. They work with local businesses to sell their ‘end of the day’ produce at a reduced price. Meaning the consumer reduces food waste, supports local businesses and gets amazing quality food for a fraction of the price. (Not a sponsor but if you’re in London or Sweden it would be silly not to check them out!).

Anyway, back to the toast…

Top that warm toast off with some tasty dairy-free ‘butter’ and top with a thick layer of peanut butter. Spread the jam on one half and place pieces of the now cooled salted peanut caramel brittle on the other. Top with a few sliced strawberries and devour!


Enjoy!


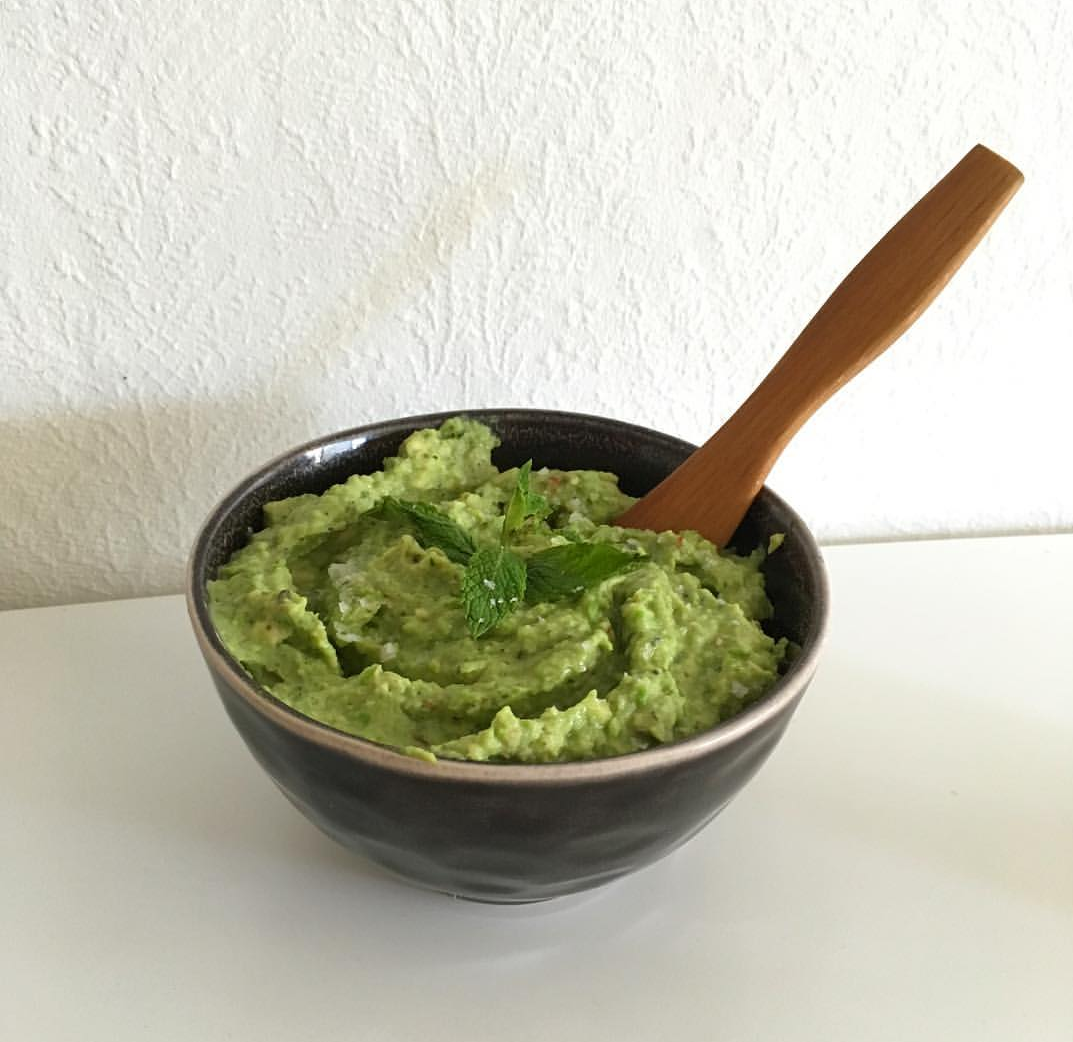
Food: My ‘God’s Butter’

Sarah Philpott’s book ‘The Occasional Vegan’ has been a regular source of inspiration to me, containing an array of recipes from different cuisines, all vegan. So, whether you fancy a Buddha Bowl or a dirty vegan ‘pork pie’, she and the book has you covered. The recipes give a great foundation, that if you want to differ from it, verse and gospel, you can. This brings me to the greatness that is her ‘God’s Butter’ and my version of it. Such an easy and satisfying recipe for a pea, avocado and mint spread. You’ll find the original recipe on Page 47 of the book. To make my version of the recipe, you’ll need:

  • 200g frozen peas or petit pois
  • 1-2 ripe avocados
  • Zest & juice of 1 lime
  • 200g canned butter beans  (drained)
  • 1/2 a red chilli, sliced finely
  • 1 tsp fresh ginger, grated
  • Handful of fresh mint, chopped
  • 1tsp garlic infused oil
  • Salt & pepper


Boil the peas for 2-3 minutes, then take off the heat whilst they are still bright and green, rinse under a cold tap, until cool. Place in a mixing bowl. Add in the rest of the ingredients (I’d chunk the avocado up, to make it easier to blend). Plug in a stick blender and pulse until it comes together into a green and aromatic spread. Season & you’re ready to serve.

My version is a lot smoother than the original, as I think with it being smoother it’s more versatile to be used as a base for a pasta sauce and a spread for toast. Below are just some of the ways I’ve used it.


Enjoy!


Published By Seren Books, RRP £12.99

With Pictures by Manon Houston

Food: Easy Oatly mango ‘kulfi’

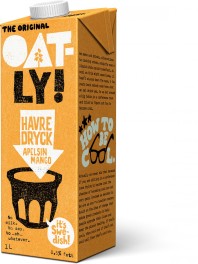
When the Oatly branded product of their Orange Mango oat drink came out, loads were sceptical, is it ‘milky’? Is it ‘juicy’? And some where perplexed altogether (I like the product as it is!). You can find it in the UK at IKEA stores and it’s available from supermarkets here in Sweden.


61570_1L_Edge_ApelsinMango_SE_NO_Side_lowres-1100x1460.jpg

Oatly Orange Mango Oat Drink. Photo: Oatly


Here is a quick way you can use it creatively. To make a light but sweet kulfi-style Indian dessert.

(Makes 4)

To make you’ll need:

  • 200ml Oatly Orange Mango oat drink
  • 8tbs Oatly fraîche/ other non-dairy sour cream
  • 3tbs coconut chips (optional)
  • 3tbs golden syrup/ corn syrup
  • Pinch of salt

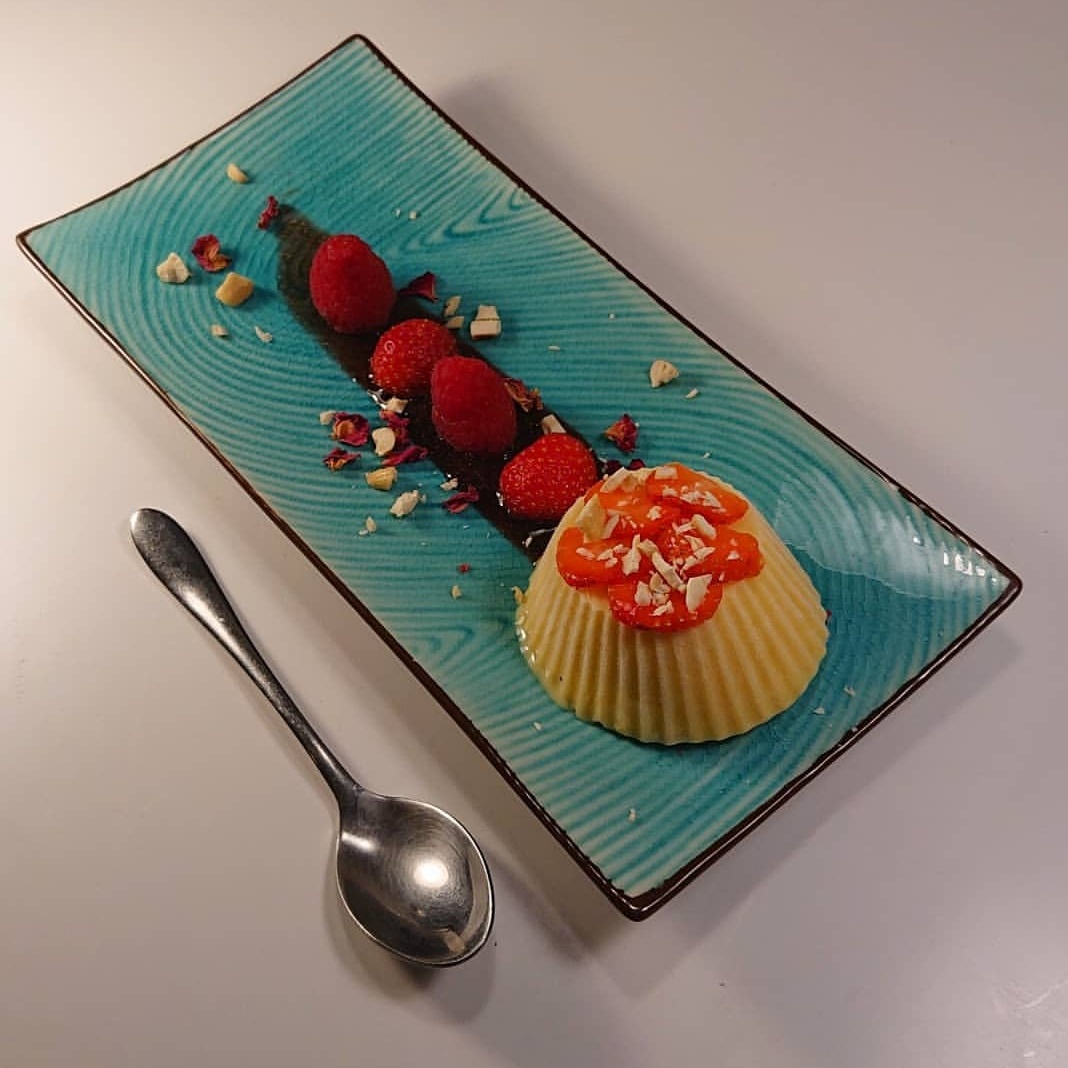
Simply mix the Fraîche and the syrup together in a bowl and slowly add in the Orange Mango, continuously stirring. Next, add in the coconut chips for added texture and the salt and stir through, then simply pour it into molds. I used silicone cupcake moulds, but feel free to use what you have and place in the freezer for at least 3 hours to set. When ready to serve take them out of the freezer a couple of minutes before you’d like to plate up and de-mould. Serve with fresh fruit, chopped nuts and a sauce. I served them with an easy raspberry and cardamom coulis.

To make:

  • 200g fresh or frozen raspberries
  • 1tbs icing sugar/ powdered sugar
  • 1tsp ground cardamom
  • Pinch of salt

To make it couldn’t be any easier. Place all the ingredients into a small saucepan or frying pan and heat on low until the raspberries start exuding their juice. Take off the heat and blend it down with a food processor. Strain out the seeds and pour in a jug. Leave to cool for serving.

To save time, I’d make the coulis whilst the ‘kulfi’s are in the freezer. The result should be a light vegan-alternative to a very rich Indian dessert. Purists will say it isn’t the same as a real kulfi that takes hours, but for a quick, convenient dessert that’s dairy-free it’s not bad at all!

Enjoy!

Food: Review: The Occasional Vegan

Sarah Philpott begins her book with a quote from George Bernard Shaw but I’m going to begin with a quote of hers:

“I’m a home cook, not a professional chef, but I’m passionate about inspiring others to eat well, simply, cheaply and above all, creatively.”

There is so much in this book and its origins that I can relate to. It’s the reason I started this blog, it’s the reason I still keep my Instagram, it’s the thing I think about in the shower, on the bus and rolling around at night when I can’t sleep. Food is a big part of my life and has been forever and reading through Sarah’s book I get where she’s coming from as a working class girl, growing up with food being a cornerstone of her life too.

Besides from the fact that we’re both Welsh and grew up in the nineties, there’s a lot in Sarah’s book that reminds me of my own complicated relationship with food. Food hasn’t always made me happy and I’m happy to sing that from the rooftops. I’ve struggled with an eating disorder, low self esteem and boughts of depression in my life that have been hard to deal with. Sometimes food has been my friend and at other times it has definitely been my enemy. It wasn’t until a few years ago (early 2015 to be exact) that my true passion for cooking and inventing food became a reality. Until then I’d been mostly living at home and my mother rules her kitchen with an iron rolling pin. Most of my suggestions for a splash of this and a dash of that fell on deaf ears. In fairness my Mam is an excellent cook so a lot of the time it was a case of “if it isn’t broke, don’t fix it!”. That being said I thrived on having my own kitchen and my own ingredients to play around with.

The title of the book belies the fact that Sarah is a full Vegan and she lays out her reasons and the argument for going Vegan right at the start. It’s a book aimed at people who may be on the cusp of going the whole nine yards, who have never considered it before or people who have already made the leap. Stacked from beginning to end with recipes which are self confessedly “easy to make”, her aim was to deliver “proper home cooking” and she achieves that with aplomb. You will find a blast from the past in this book, especially if you’re Welsh!

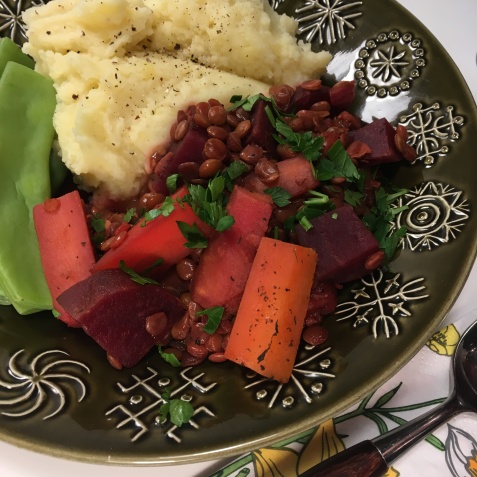
So, I’ve been lucky enough to get a hold of an advanced copy from Seren and I’ve spent some time pouring over it and decided to create two recipes from the book. The ‘main’, as it were, is her Beetroot Bourguignon, a brilliant and simple take on this classic French dish. For the second I chose and old favourite from my own past, her Bara Brith. I was especially keen to see how both coped with the translation from non to Vegan and I’m delighted to say both are absolutely delicious. I was also keen for something that would make a worthy meal for Easter Sunday, something classy but also casual and not too strenuous. As it happened I’d just returned from an epic walk and needed something that was easy to make and I was not disappointed.
IMG_6245

Beetroot Bourguignon

Both recipes are deceptively simple but this one I was a little more curious to see how it cooked. I’m used to slow cooking everything but this recipe is a wholly hob affair and works brilliantly. The recipe itself is super easy follow, made from ingredients that are readily available and cheap to buy. I halved the recipe for myself and my partner and it still made enough for us to eat the meal twice without being stingy on portion sizes. It calls for the veg to be chunky and this suits doing this meal fast with little fussy prep work beforehand.

One slight deviation I made was making my own stock. It calls for a lot of stock and/or wine and this is where the depth of the flavour really comes from. I made mine by peeling my veg over a simmering pot and chucking in the ends of the onions and the garlic, seasoning with a bit of salt and leaving it to bubble away while I continued with the recipe. After about 20-30 minutes it worked its magic and was ready to be used. It’s a great way of avoiding stock cubes (which can be pricey) and using up your food waste. It’s one of those little cheats you can pick up easily and will quickly become part of your cooking regime. Leftover snag ends of leek or cauliflower or broccoli, stick them in a bag and hide them in the fridge until you’ve got enough to brew away on the stove. You won’t regret it as it will really give your cooking character.

The only time the recipe really takes is the time it takes for the green lentils to finish cooking. Don’t be tempted to go red, they’re way too gritty and don’t have the heft and richness of green lentils when fully cooked. When they’re done the whole thing is, forgive the phrase, meaty and substantial. I love how the beetroot just permeates all the veg with a deep, ruby red quality so the whole thing just glows on the plate. You might also be surprised to know that the beetroot doesn’t overpower everything else, it’s the primary flavour don’t get me wrong, but it’s a deep and complex flavour that goes brilliantly with mash and fresh greens.
IMG_7530

Bara Brith

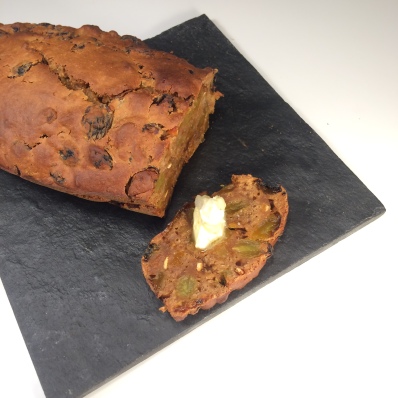
For the Welsh, Bara Brith is an institution and as it was our first Easter in Malmö I was feeling a little bit of hiraeth (a Welsh word that defies literal translation but in essence means ‘a longing for home’). Translated, bara means bread and brith, as Sarah points out, “refers to the speckles of the dried fruit in the loaf”. It’s a classic, old school soaked fruit cake and is traditionally served with lashings of butter and tea. Traditionally they have egg and milk in them, which are, I’m happy to say, wholly redundant ingredients. It calls for a splash of non dairy milk but other than that all rising and binding duties are handled brilliantly by the rest of the ingredients. I regret to say I was a shade more dubious about this one than the bourguignon, maybe it was the blood of my ancestors crying out, but I’m thrilled to say my doubts were totally unfounded. The bake handles beautifully and the fruit maintain their succulence so each spiced bite comes away soft and sweet and bursting with flavour.

I deviated once more, fractionally this time, from the recipe as I used jumbo golden sultanas, as they are abundant in Malmö. As a variation on a theme they were a brilliant choice as they swell with tea to almost grape sized nuggets. I made sure to use Glengettie, a proper Welsh brew that my good friend Nia sent us in a care package from home, for the recipe as I knew that the common or garden black tea you get abroad wouldn’t cut the mustard. As for the recipe’s execution it couldn’t be much easier than this: soak fruit, measure dry ingredients, combine, stir and pour into a baking tin and cook until done. I would recommend watching over it for the last half an hour or so to check when the knife comes out clean as the fruit and the dough can make things a little deceptive. It makes quite the substantial loaf so it would be perfect for serving your friends and relatives if they come over. As a proud Welshman I couldn’t have been more impressed with the recipe and if you aren’t Welsh then I would recommend this as an alternative to the usual tea cake recipes. Perfect for a Welsh addition to a Swedish Fika (with some vegan butter and a sprinkle of Halen Môn salt, of course)!

Even though I’ve picked two of the more traditional recipes from the book, one of the things that excited me when reading it was the variety of the origins of her recipes. It’s a modern and worldly book and you can really feel her love for exciting and diverse flavours. I really can’t wait to make her porkless pie as it really excites me from a flavour and food innovation perspective. Easy to make, cheap to prepare and packed with hearty flavours, I’ve got to say I will be flicking through this one time and again for inspiration in the future.


Published By Seren Books, RRP £12.99

With Pictures by Manon Houston

Food: Rude Food Recipe 4: ‘Keep the cold at bay’ soup


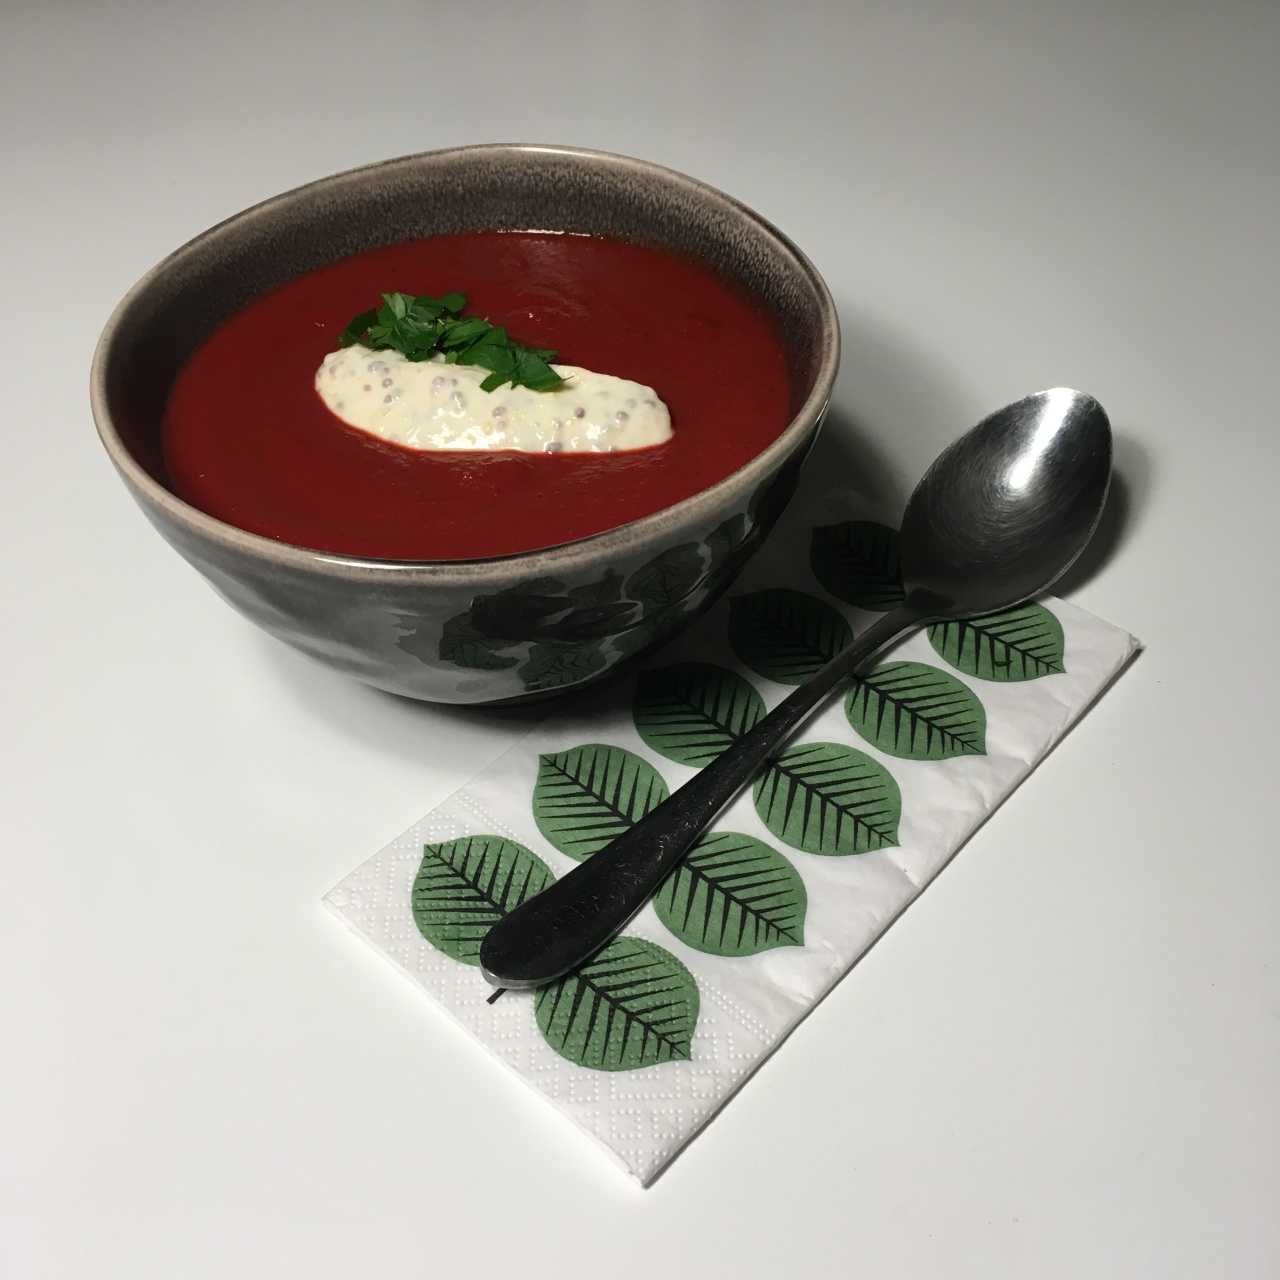
The #Beastfromtheeast has left its mark over all of northern Europe it seems and snowy Malmö is no exception. I’ve decided to take matters into my own hands with this stalwart soup that will batten down the hatches with plenty of fresh alium and flush out any lingering nasties with the heat of the chilli. The level of any of these is preferential, but here are the amounts that I used.

You will need:

  • 1 pack of cooked Beetroot, and its juice
  • The zest & juice of 1/2 lemon,
  • 1/2 tsp chilli, (go full tsp if you’re feeling particularly under the weather!),
  • 2 medium potatoes,
  • 1/2 an onion,
  • 1tbs Sauerkraut juice (optional, I used some, leftover from my dear friend Kathe Kaczmarzyk’s pop-up here in Malmö) ,
  • 3 cloves of garlic,
  • 3 rhizomes of fresh turmeric, grated,
  • 1/2 tsp ground cinnamon,
  • 1/2 tsp ground ginger,
  • Salt & pepper,
  • 500ml homemade veg stock
  • 1tbs dried parsley,

For the orange, ginger & mustard crème:

  • 2tbs dairy free crème fraîche (I used Oatly fraîche)
  • 1tsp wholegrain mustard
  • zest & juice of 1/4 orange
  • Thumb- size piece of ginger, grated

Garnish:

Handful of fresh parsley, chopped.


The method for soups is always fairly simple, the magic here is the contents and not the process.

Chop the onion, the garlic and the onions roughly, separately chop up the beetroot into chunks and make sure you keep the juices.

Gently soften the onion and the garlic in a little oil and then add the potatoes, stir them through. Begin to add the lemon juice, the sauerkraut, the beetroot pieces, the beetroot juice and then grate in the lemon zest and the turmeric. Be careful with the fresh turmeric as it will stain anything, including your skin, so you might want to use gloves. Add the spices, the herbs and then pour over the stock, season to your taste including the chilli!

Bring the whole thing up to a robust simmer before sticking in the oven at 140 degrees celsius (fan assisted) and allow it to do its thing for at least an hour. Take the whole thing out, stir and check the seasoning. When you’re happy with it you can blast the whole thing with a stick blender or a food processor until it’s thick.

The aroma should be rich and earthy with the beetroot and the garlic, the back notes from the sauerkraut and the lemon should be sharp and punchy. The heat should be there to the taste too from the chilli. The colour should be like you’ve liquidised rubies.

For the punchy crème, simply mix all the ingredients together into a bowl and leave to thicken for 5 minutes.

Serve with a good loaf of your favourite sourdough, a sprinkle of chopped parsley and a generous dollop of the punchy fraîche.

Enjoy!

Food: Rude Food Recipe 3: Vegan ‘Tatws pum muned’

As St. David’s Day, or the National holiday of Wales was last week, I’d thought that I’d make a Welsh dish with the rescued food from Rude Food Malmö.

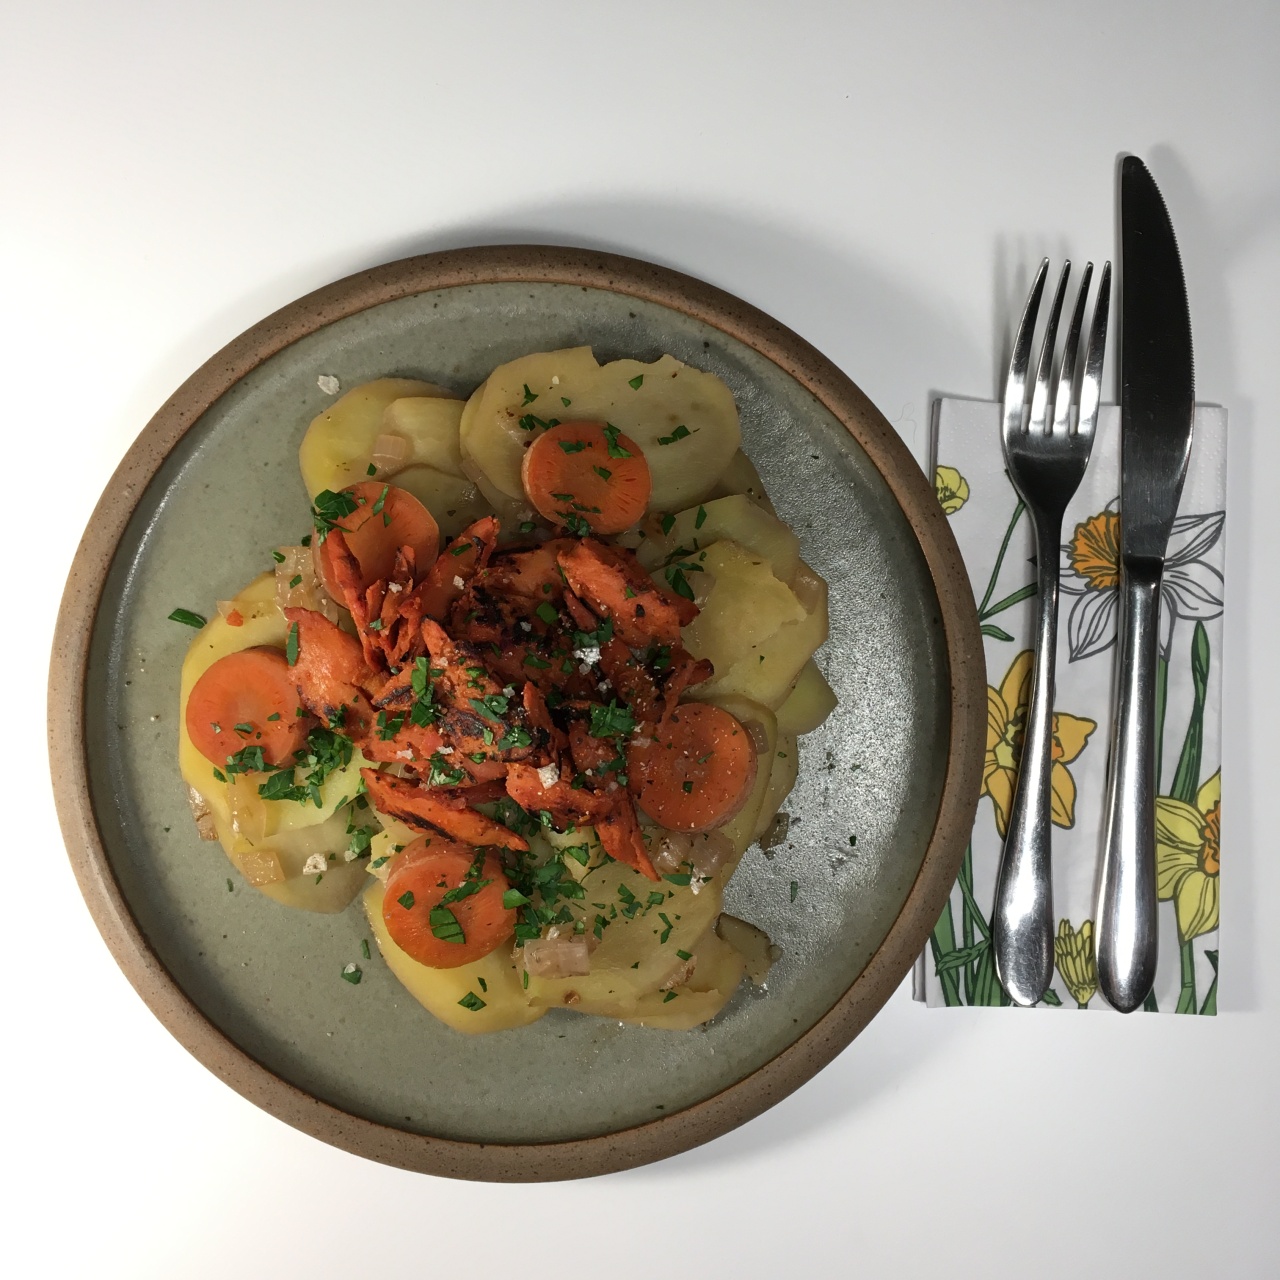
This is my vegan take on the traditional dish, ‘tatws pum muned’ or ‘five minute potatoes’. It takes a little bit longer than five minutes to cook and prepare, but not much longer. This is proper home cooking so the flavours and method are super simple, but considering how cold the weather has been this week then this is exactly the kind of food I crave.

A hearty dish of thinly sliced potatoes and onions, cooked in some homemade stock, topped with some fried ‘ham hock’, made with Like Meat kebab chunks. Finished with some freshly chopped parsley &  a sprinkle Halen Môn celery salt.

You will need:

  • 3 medium potatoes (peeled)
  • 1/2 an onion,
  • 1 small carrot,
  • 250ml of stock, I used homemade veg stock using up leftovers & peelings
  • Handful of fresh parsley (chopped, to serve)
  • Salt and pepper,

For the ‘ham’:

  • 1 pack of Like Meat kebab chunks,
  • Couple of drops of liquid smoke,
  • 1 tsp smoked paprika,
  • 50ml of beetroot juice (if you have it),


Method:

Slice the potatoes thinly with a mandolin and put them in a bowl of cold water so that they don’t go brown while you’re doing the rest. Parboil the carrots in the stock water, when they’re beginning to soften remove them from the water.

Prepare the Like Meat kebab chunks (or as we are making them into a ‘ham hock’ substitute) in a medium bowl by adding the liquid smoke and smoked paprika. Add a splash of beetroot juice to make it a bit more pink (like ‘ham hock’ basically). When it’s stirred through you could leave it to marinate if you want. Along with the potatoes, they can sit until you’re ready to start cooking.

When you’re ready to begin, place a medium frying pan on a high heat and fry off the ‘ham’ pieces in a little oil. When they’re the colour of your preferred bacon put to one side on a plate. Give the pan a quick wipe to get rid of the colours that will stain. Lower the temperature of the pan and soften the onions. Drain the potatoes from their water and add to the pan.

In a wide frying pan brown the onions in a little oil and then add the potatoes, the carrots and the stock. I placed a Le Creuset lid over the potatoes to keep them under the water while they cook. Now, the name says five minutes but the cooking time is more like eight! When the potatoes are nice and tender remove from the heat and get rid of most of the stock (you can keep the stock once again and use in something else).

Plate up with the potatoes and carrots first, then scatter the ‘ham’ pieces on top and then garnish with plenty of freshly chopped parsley and a generous pinch of sea salt, I used Halen Môn’s celery salt.


Enjoy/ Mwynhewch!


Food: Raw vegan ‘semlor’

As it’s semlor season here in Sweden for Fettisdagen, or ‘Fat Tuesday’, when these buns are traditionally eaten before lent. The traditional semla is a cardamom- enriched bun with homemade marzipan, called ‘mandelmassa’ and plenty of whipped cream. For this raw vegan version, I’ve decided to use persimmon/ kaki/ Sharon fruit in place of the bun. I was going to use peaches, but they seem to be impossible to get at the moment, not being in season.  As I’ve used persimmon, I decided to top it with a bit of matcha powder, a nod to the asian heritage of the fruit,


Makes 6 mini semlor bites

To make you’ll need:

  • 3 persimmon/ kaki/ Sharon fruit
  • 1.5 litres of water
  • 1 tsp ground cardamom
  • 1 tsp almond oil
  • 1 shot of amaretto (optional- don’t use if want to make it totally raw vegan)
  • 2 tbs raw agave syrup
  • 1tbs matcha powder, to top

For the mandelmassa:

  • 150g soaked almonds
  • 150g coconut sugar
  • 1-2 tbs water

For the coconut & cardamom cream:

  • The ‘cream’ from 2 tins of full fat coconut milk
  • 3 tbs raw agave syrup
  • 2 tsp ground cardamom
  • 1 tsp vanilla bean paste/ fresh vanilla bean


Start the night before by making up the syrup. Mix the water with the almond oil, agave and cardamom. I also added in some Amaretto, in the spirit of the decadance of a semla bun, but by all means, take it out.  3 big persimmon will make 6 mini semlor buns. To make them, I’d recommend slicing each fruit into 4 equal pieces and cutting out the middle with a round cookie-cutter. This should leave you with a top and bottom bun for each ‘semla’. If there is any lefover persimmon, simply chop it up and keep in the fridge, it’s a great addition to any curry or jerk recipe. De-leaf the top and place into a shallow dish. Once you have done this with all 3 fruits, cover with the syrup. This should soak up all those cardamom & almond flavours of the syrup. Leave overnight.

The next day, turn the persimmon buns in the syrup and make the mandelmassa. I used the recipe off this blog  to make it, but essentially, de-skin the almonds and blend it up with the coconut sugar in a food processor, adding a teaspoon or two of water to bind.


To make the cardamom cream, spoon out the coconut cream portion of 2 cans of full-fat coconut milk into a bowl, adding the ground cardamom, agave and vanilla bean paste. Whip up into a thick and aromatic cream.


When you’re ready to assemble your mini persimmon semla, take them out of the syrup and pat dry. roll a little ball of the mandelmassa and squish into the palm of your hands. Top the bottom of the buns with the disk of mandelmassa. Next, spoon on about a tablespoon of the cream. Top with the ‘top bun’ of persimmon and dust with some matcha powder.


Enjoy!

Food: Easy broccoli & borlotti bean penne with my Zogghiu

On the weekend I bought a big bunch of fresh mint from my local greengrocer for a Middle-Eastern dish. I was left thinking what to make with still a sizeable bunch left-over. Turn to Sicily!

In Sicily, unlike other parts of Italy, they have a special Eastern Influence on their flavours, because of the island’s special history, this has lead them to use mint as a herb, rather than just a garnish or for sweets. This has produced some real treasures like zogghiu, a minty & pistachio filled pesto. It would normally have some parsley too, but my version still produces a great, fresh & zingy sauce for pasta.

Serves 2

To make you’ll need:

  • 200g dried penne (100g per person)
  • Half a head of broccoli, cut into florets
  • 1 tin of Borlotti beans, drained

For the zogghiu (pesto):

  • Bunch of fresh mint (cut the stalks off)
  • 3 cloves of garlic
  • 4tbs rapeseed/ olive oil
  • 1tbs pine nuts
  • 1tbs pistachios (unsalted & shelled)
  • Zest of 1/2 lemon
  • 1tbs white wine vinegar
  • Salt & pepper

Garnish:

  • Few mint leaves
  • handful of pistachios

Start with the pesto, simply add the ingredients into a food processor and whizz up into a fragrant green paste. Before blending, keep a few mint leaves aside for garnish. Remember to stop half way, scrape the sides down with a spatula and go again, this will ensure a smoother, more even pesto. Then remove and scrape into a bowl.

Put a pot of salted water onto boil, as it gets up to speed, place in the broccoli. Poach until they’re tender, but still have a bright green colour. Remove with a scoop. Place the pasta in and cook for 8-10 minutes, until al-dente. In the last minute of cooking, add in the Borlotti beans. Strain and place back into the pan. Add the florets of broccoli and pour in 1/2 of the pesto. You can store the other half in the fridge or freezer for a future meal. Fold the minty sauce through the pasta and vegetables. Then scoop into bowls. Add a few mint leaves and a handful of pistachios as a garnish, a nod to whats in the very special pesto.

Enjoy!